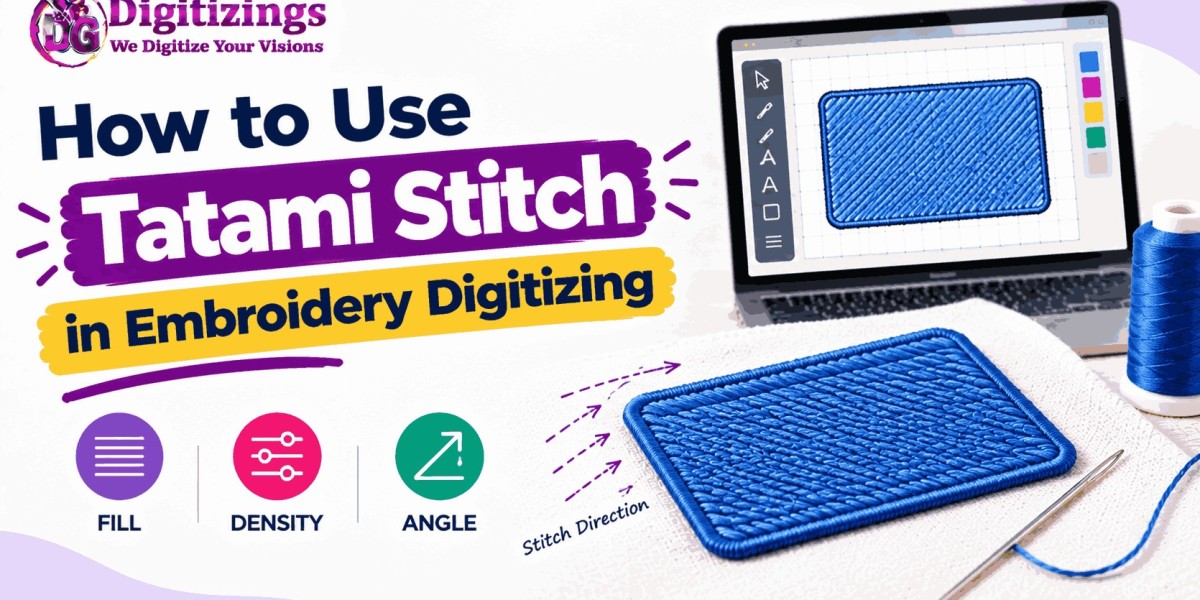

Tatami stitch is one of the most useful fill-stitch techniques in embroidery digitizing. It can cover large and medium-sized areas while creating a clean, structured appearance. When used correctly, it provides good coverage without relying on excessive stitch density.
For beginners, however, Tatami stitch can take some practice. Settings such as stitch spacing, stitch length, underlay, stitch direction, and pattern selection all influence the final result.
Understanding how Tatami stitch works makes it easier to create embroidery files that stitch smoothly and look consistent on fabric.
This guide explains what Tatami stitch is, where to use it, how to set it up, and how to avoid common problems.
What Is Tatami Stitch?
Tatami stitch is a type of fill stitch made from rows of stitches that cover a defined embroidery area.
The stitch rows are arranged in a controlled pattern rather than using one continuous satin-style column.
Tatami is commonly used for:
Large filled shapes
Medium-sized design areas
Background sections
Logos
Lettering with wider areas
Decorative artwork
Detailed embroidery designs
Its appearance can vary depending on stitch direction, density, stitch length, and the selected fill pattern.
Why Tatami Stitch Is Useful
Tatami stitch is particularly valuable when an embroidery area is too large for a standard satin stitch.
Satin stitches are generally suited to narrower columns and borders. Trying to fill a very wide area with satin can create excessively long stitches and an unstable embroidery structure.
Tatami provides a practical alternative by covering the area with multiple rows.
It can produce a smooth filled appearance while giving the digitizer greater control over stitch direction and density.
Tatami vs. Satin Fill
Understanding the difference between these two structures is important.
Satin stitch usually consists of stitches that travel across a relatively narrow shape from one side to the other.
Tatami fill builds coverage through multiple rows.
Use Tatami when the area is broad enough that satin would become impractical.
Use satin when the shape is narrow and benefits from a smooth, raised stitch appearance.
Choosing the appropriate stitch type can improve both appearance and production efficiency.
Where Tatami Stitch Works Best
Tatami is most useful in areas where consistent fill coverage is required.
Large logos are a common example.
A broad letter, background shape, animal silhouette, or decorative element can often be filled with Tatami rather than using multiple narrow satin sections.
Tatami can also be useful for creating subtle texture when the stitch direction or fill pattern changes between sections.
Set the Stitch Density Carefully
Density determines how closely the Tatami stitches are placed.
If density is too low, fabric may show through the design. If density is too high, the embroidery may become stiff and unnecessarily heavy.
Excessive density can also increase:
Stitch count
Thread consumption
Production time
Thread-break risk
Fabric distortion
The correct density depends on the fabric, thread, design size, underlay, and desired coverage.
Avoid choosing a density value simply because it worked on another project. Different materials can require different settings.
Choose an Appropriate Stitch Length
Stitch length affects the appearance and stability of Tatami fill.
Extremely short stitches can increase stitch count and create excessive density. Very long stitches may produce poor coverage or become less stable.
A balanced stitch length can help create a consistent surface without unnecessary stitching.
When adjusting stitch length, inspect the design at its actual production size rather than relying only on a highly enlarged software preview.
Control the Fill Pattern
Tatami does not have to look identical in every design.
Different fill patterns can change the way stitches are distributed across the area.
Pattern variation can be useful for creating subtle texture or preventing large sections from appearing visually flat.
However, the pattern should support the artwork rather than add unnecessary complexity.
For a simple logo, a clean and consistent fill may be preferable. For decorative artwork, controlled variation can add visual interest.
Use Stitch Direction to Add Structure
Tatami fill becomes more effective when stitch direction is planned carefully.
Changing the direction between neighboring design sections can help separate shapes and create visual movement.
For example, one section may use a horizontal direction while another follows a curved or angled structure.
Stitch direction also affects how thread reflects light.
Thoughtful direction can make a flat digital shape appear more dimensional after embroidery.
Do Not Ignore Underlay
Underlay is important when using Tatami fill, particularly on fabrics that move or stretch.
It provides a foundation beneath the visible stitches and can help stabilize the material.
Suitable underlay can improve:
Fabric stability
Coverage
Edge definition
Stitch consistency
Overall design structure
However, adding excessive underlay can make the design unnecessarily bulky.
The underlay should complement the top Tatami fill rather than simply adding more stitches.
Consider Pull Compensation
Fabric can move as embroidery is stitched.
This movement can cause filled areas to become slightly narrower or create gaps between neighboring elements.
Pull compensation helps account for this behavior.
If compensation is too low, gaps may appear. If it is excessive, edges can become too large or distorted.
The correct adjustment depends on the fabric, design size, stitch density, and construction.
Pay Attention to Tatami Edges
The edges of a Tatami-filled area need to remain clean and defined.
Poor edge construction can cause jagged borders, gaps, or uneven coverage.
When a filled section meets another design element, consider how the two areas will overlap.
A slight overlap can sometimes help prevent visible gaps caused by fabric movement.
However, excessive overlap can create unnecessary density.
Avoid Large Areas With Identical Stitch Direction
Large blocks of Tatami with exactly the same direction can sometimes appear visually flat.
Changing direction between appropriate sections can create texture and make the artwork easier to understand.
This does not mean that every small area needs a different direction.
Instead, use directional changes where they contribute to the design.
Use Tatami for Layered Designs
Tatami can be useful when creating designs with multiple layers.
A background area may use one fill direction while a foreground element uses another. This creates separation even when both areas use the same thread color.
Layering can also help create visual depth.
The sequence should be planned carefully so that later elements sit correctly over the underlying sections.
Be Careful With Overlapping Fill Areas
When two Tatami sections overlap heavily, the combined density can become excessive.
This may create thick areas that are difficult for the machine and uncomfortable on the garment.
Instead of allowing every section to stitch at full density, review the overlap and adjust the design structure.
Possible solutions include:
Reducing unnecessary coverage
Adjusting the overlap
Changing the stitch direction
Modifying density
Simplifying the underlying shape
Efficient digitizing uses stitches where they are needed rather than filling every area repeatedly.
Tatami Stitch for Different Fabrics
The same Tatami settings may not work equally well on every material.
Cotton
Cotton can provide a relatively stable base, but stabilization and density still matter.
Fleece
Fleece has a textured surface that may hide fine details. Strong design definition and suitable foundation stitches can be helpful.
Denim
Denim is relatively stable and can support substantial embroidery, but heavy designs should still be planned carefully.
Stretch Fabrics
Stretch materials can move more during stitching. Underlay and compensation become particularly important.
The fabric should always be considered when setting up Tatami fill.
Tatami Stitch for Large Logos
Tatami is commonly used for large logo areas because it can cover broad shapes efficiently.
For a large company logo, the digitizer can use Tatami for solid sections while using satin or running stitches for narrower details and outlines.
This combination can produce a balanced design without forcing one stitch type to handle every part of the artwork.
Using Tatami With Lettering
Tatami can work well for larger lettering where the letter shapes contain broad areas.
However, very small text usually requires a different approach.
Small letters have limited space for multiple rows of fill. If Tatami is forced into extremely small areas, the result may become crowded and difficult to read.
For smaller lettering, an embroidery-friendly satin structure or specialized small-text approach may be more appropriate.
Common Tatami Stitch Problems
Beginners often encounter a few recurring issues.
Uneven Coverage
This can result from unsuitable density, stitch length, or fill settings.
Fabric Showing Through
The design may need better density, underlay, or stabilization.
Excessive Thickness
Too much density or overlapping can create heavy embroidery.
Poor Edges
Incorrect edge compensation or insufficient overlap can create gaps or uneven borders.
Flat Appearance
Poor stitch direction can make large sections look visually dull.
Thread Breaks
Excessive density, unsuitable stitch lengths, or machine-related issues can contribute to thread breaks.
The best solution depends on the actual cause rather than simply increasing the number of stitches.
A Simple Tatami Digitizing Process
A practical approach can make Tatami digitizing easier for beginners.
Step 1: Prepare the Artwork
Clean the artwork and simplify details that are too small for embroidery.
Step 2: Identify Fill Areas
Determine which parts of the artwork require broad coverage.
Step 3: Create the Shape
Build the embroidery object according to the intended design boundaries.
Step 4: Select Tatami Fill
Apply Tatami to suitable medium and large areas.
Step 5: Set Density and Stitch Length
Choose balanced settings based on the design and fabric.
Step 6: Add Underlay
Provide a suitable foundation for stability and coverage.
Step 7: Adjust Direction
Use stitch direction to follow shapes and create visual separation.
Step 8: Add Compensation
Account for expected fabric movement and pull.
Step 9: Check the Sequence
Make sure overlapping sections stitch in a sensible order.
Step 10: Test Stitch
Run a sample and make targeted adjustments before production.
How to Improve Your Tatami Results
Improvement comes from comparing digital settings with physical embroidery.
When a test does not look right, examine one factor at a time.
If coverage is weak, review density and underlay.
If the design is too heavy, inspect overlapping areas and stitch density.
If the edges are distorted, review compensation and sequencing.
If the surface looks flat, consider whether stitch direction can better follow the artwork.
This method helps beginners understand cause and effect instead of changing multiple settings without knowing which adjustment worked.
When Professional Digitizing Is Useful
Tatami fill may appear simple, but creating reliable production files requires practical knowledge of embroidery behavior.
Large logos, detailed artwork, specialty fabrics, and high-volume production can benefit from professional digitizing.
An experienced digitizer can balance stitch density, direction, underlay, compensation, sequencing, and fabric requirements.
The objective is not simply to create a file that opens in embroidery software. It is to create a file that performs well when stitched.
About Digitizings
Digitizings provides professional embroidery digitizing and vector art services for businesses, apparel brands, embroidery shops, and individuals.
The service can convert logos, artwork, images, and other designs into embroidery-ready files while considering important production factors such as stitch structure, fabric, size, density, and design details.
For designs that contain large filled areas, careful use of Tatami stitch can help create clean coverage and a consistent embroidered appearance.
Conclusion
Tatami stitch is a valuable tool for covering medium and large embroidery areas. Its row-based structure makes it practical for logos, backgrounds, broad lettering, and many types of artwork.
Successful Tatami digitizing depends on more than selecting a fill setting. Density, stitch length, fill pattern, stitch direction, underlay, pull compensation, edge construction, fabric, and sequencing all influence the final result.
Beginners should start with simple shapes, test different settings, and study the physical embroidery produced by each adjustment.
With practice, Tatami stitch can become one of the most useful techniques in your embroidery digitizing workflow.
FAQs
1. What is Tatami stitch used for in embroidery digitizing?
Tatami stitch is mainly used to fill medium and large areas with rows of stitches. It is commonly used for logos, backgrounds, broad lettering, and solid artwork sections.
2. Is Tatami stitch the same as fill stitch?
Tatami is a type of fill stitch. It uses organized rows of stitches to cover an embroidery area and can be adjusted through density, stitch length, pattern, and direction.
3. What happens if Tatami density is too high?
Excessive density can make embroidery heavy and stiff. It can also increase stitch counts, thread consumption, production time, and the risk of fabric distortion or thread breaks.
4. Can Tatami stitch be used for small lettering?
It can be used for larger lettering with broad areas, but very small text may not have enough space for multiple fill rows. A different lettering structure may provide better readability.
5. Why does my Tatami fill look uneven?
Uneven Tatami can result from density, stitch length, underlay, fill pattern, stitch direction, compensation, fabric movement, or machine settings. Testing and adjusting the relevant factor can improve the result.